
The Operator’s Phonebook: How To Record


I have decided to make a series all about ways, tips and tricks that black teams can, and in my opinion should, use their cell phones when on engagements. Having been in this field for nearly 20 years, worked all over the world and trained hundreds of students, there are a few things regarding the phone that often go overlooked that can really change how smoothly your engagement runs. And with that idea in mind, I decided to create a series that will help you and your team better use the almighty cell phone.
Today I am going to dedicate this post to a simple but often missed oportunity by team members on how to best record findings when under cover … and yes this will also apply for those on a physical audit.
When you're navigating a building covertly, bypassing locks, cloning badges, or tailgating into restricted areas, there's a lot happening all at once. How do you ensure that everything you're seeing and discovering in the moment is documented in a way that makes sense later — not just to you, but to the rest of your team?
What if you need to explain why a particular lock mattered, or which cabinet you were targeting and why? At the end of a pentest, the data you've collected — especially visual data — is only as good as its clarity and context.
Most teams end a physical penetration test with hundreds of photos and silent videos — blurry badge readers, unclear server racks, endless doorframes — with little to no annotation.
The result is a confusing mess: no timestamps, no notes, no idea which floor a particular camera was on or what made that exposed Ethernet jack important. But there's a simple technique to dramatically increase the usefulness of your visual evidence: record video with live commentary.
The Problem with Unlabeled Media
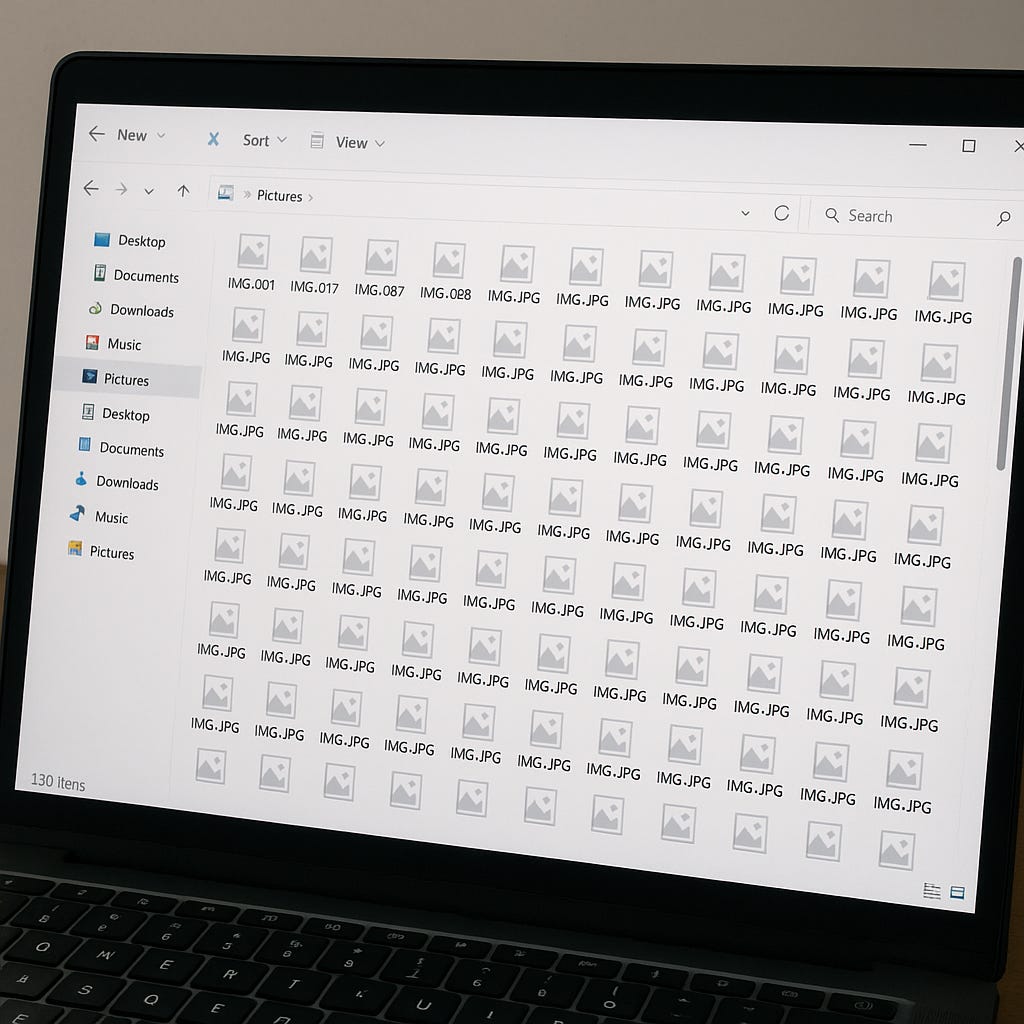
Let's paint the picture: you just wrapped up a 14 day engagement and you have 5 people on your black team. You and your team dump all your phone media into a shared folder. There are 250+ photos and videos with filenames like IMG_2345.jpg, VID_1202.MP4, and so on.
No one remembers what was special about IMG_2345. Was that the poorly mounted security cam in the break room, or the wireless access point with the default credentials?
Silent videos fare little better: maybe someone zoomed in on a ceiling tile — but what were they trying to highlight? A hidden antenna? A bypass route? A missing camera?
Without context, even good footage becomes just another piece of noise.
Side-by-Side Comparison
To really drive this point home, take a look at the following image and note anything you find interesting or notable.
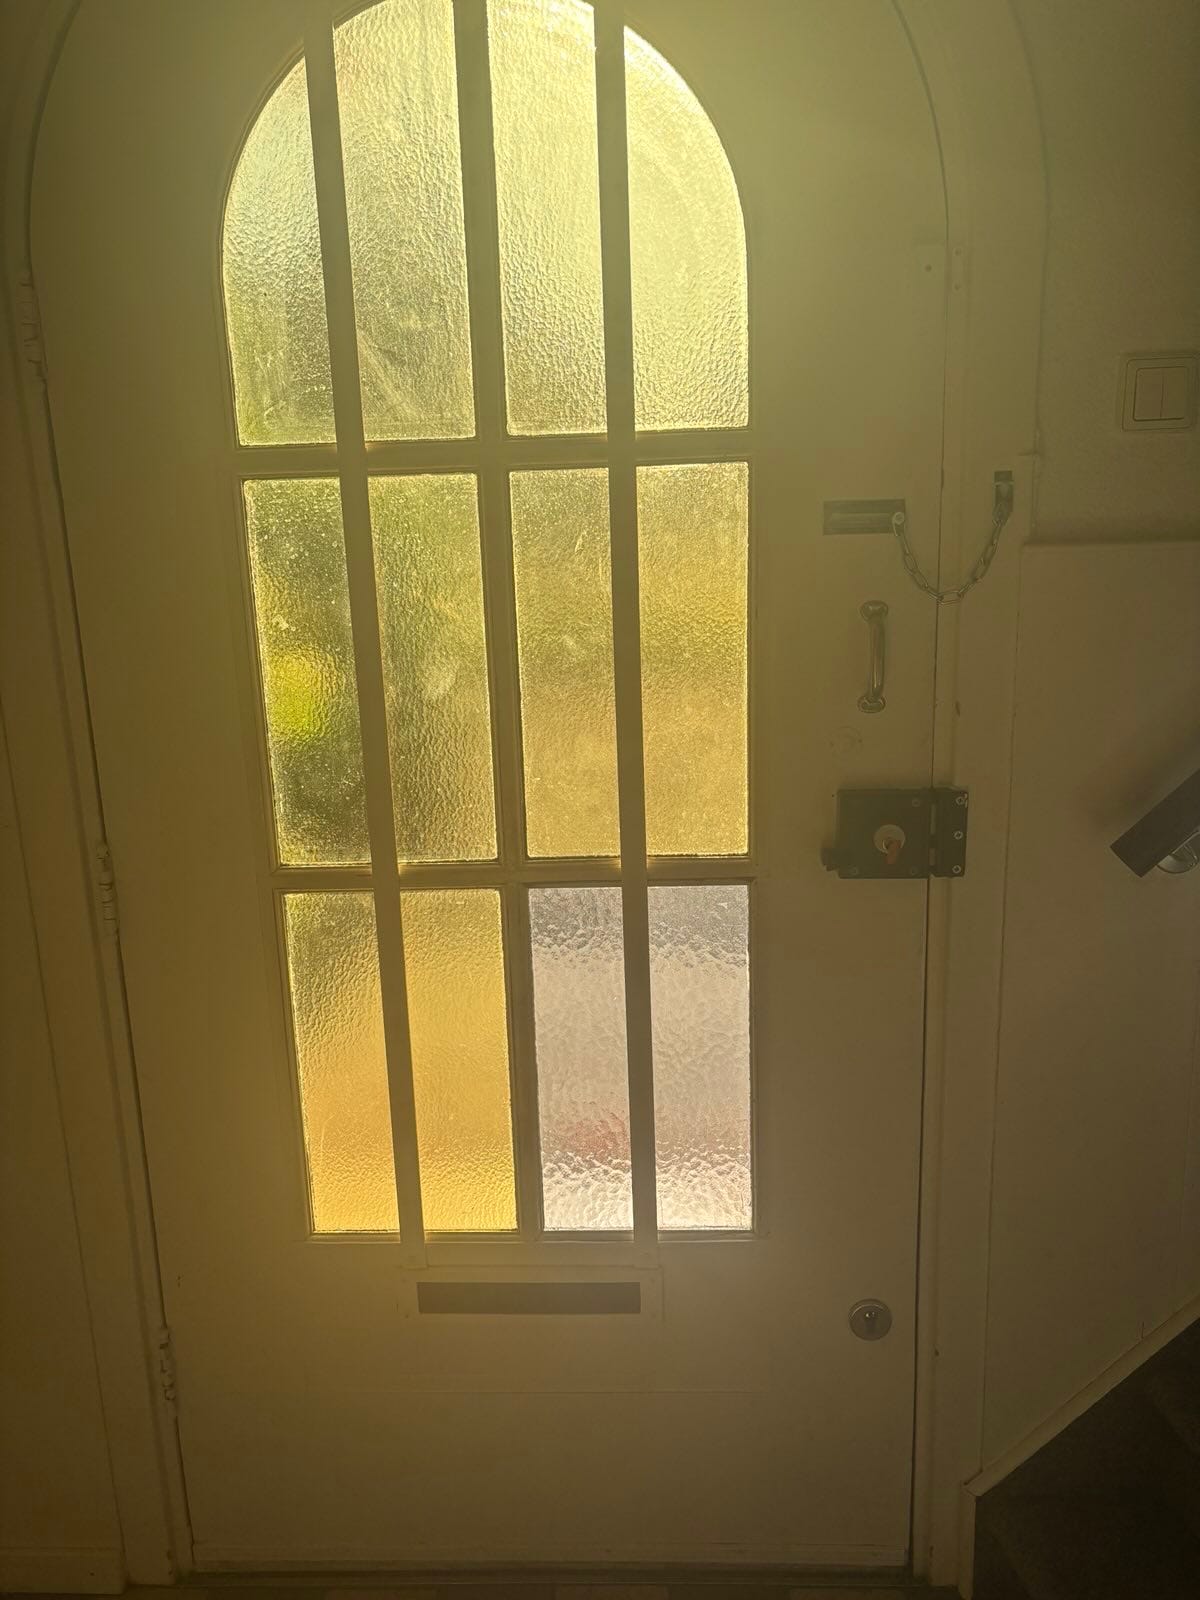
Now, suppose this image is from someone on your team, and there is no context, meaning that this image may be one of 20 that comes into the group chat today.
You don’t know
Where this door is in the building
What was the relevance for why this door was photographed
The image is not of the greatest quality so some features may be obscured. How many of you noticed the alarm in the upper corner

Now lets try a silent video and see if it improves things
We certainly have a better look at the door, and can see the alarm in a better lighting, but honestly thats about it. Not really much improvement to speak of. So lets try one more time, but adding what the pentesters was thinking when he recorded it.
Ok, so we suddenly get a lot more useful info. We now know where this door is located in the building, that only one lock and a chain are relevant and the alarm has been disabled.
Because this client leaves the key in the door, and their happens to be a mail slot, with the right kit we can get that door open in seconds and bypassing a chain is equally easy.
But hopefully you see that the video with commentary greatly improves the information that you wanted to convey and rememebr. Its a simple thing, but one which I find many teams don’t utilize.
Best Practices for Commentary Video Recording
By having a video with commentary you and your team have much more useful info, and if you need to return to a video days later, you don’t need to try and remember all the important details (assuming you were the one who recorded it in the first place).
Here are a few quick tips to make your commentary videos as useful as possible:
Keep it Short and Focused: 10–30 seconds is usually enough. Don’t ramble.
Speak Clearly and Describe What You’re Seeing: Treat it like you're explaining to someone who can't see the scene.
Use Relative Positioning: “Left of the door,” “top shelf,” “second floor near breakroom.”
Situationally Aware: Obviously recording such things can raise eyebrows and so you always need to be aware of who is around you or watching
Use Codewords: If you find that you cannot speak freely, have a series of codewords ready to help you explain things in an obfuscated but unassuming way. You can read more about the use of code words here.
Texting: If you can neither give commentary nor use code words, yes it happens, record what you can, and then text what you wanted to say into a secure chat so the video is conntected to its context.
Conclusion: Make Every Shot Count
During a physical pentest, every second counts and so does every bit of data you collect. By choosing to record short, narrated videos instead of unlabeled photos or silent footage, you dramatically increase the value of your documentation.
This one small habit shift can streamline team collaboration, speed up reporting, and ensure that your findings are impossible to misinterpret.
In short: don’t just show explain. Your future self (and your team) will thank you.